As a former collector I can’t help wincing when I see a Cybis sculpture selling on eBay for a fraction of what its retail price was when originally made. After all, that was a few decades ago and isn’t art supposed to appreciate in value over time? The economy has changed, of course – we’re not in the eighties anymore, Toto – but also many people don’t realize what was actually involved in creating those pieces that once sold for thousands of dollars. Each piece required a number of artists and artisans, as well as days or weeks of painstaking work, before it exited the doors of the studio on its way to a retailer’s shelf. So what was the art of “art porcelain” in its 30-year heyday from the 1960s to the 1990s? The process can be divided into nine steps, going from the original artist (Designer) to the Painter.
Step 1, The Design Model
Every porcelain sculpture begins its life in the imagination and hands of the Designer, who creates a model of a soft grey clay material, sometimes called ‘plasticene’. This original model is deliberately made bigger than what the final piece intended to be, because the firing process will result in noticeable shrinkage.
 The clay needs to be supported to just the right extent during the modeling process: not too little and not too much as to compromise the body of the work. This in-progress model of the Knight in Shining Armor has several wood dowels supporting the parts of the horse’s body that are in the process of being shaped.
 The main elements are roughed in but there is still much detail to be added.
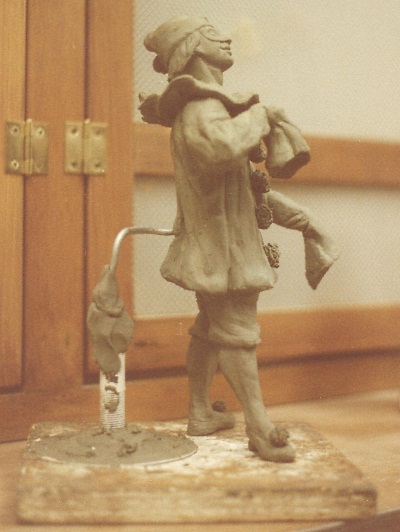 Human figures can benefit from the support of an armature during the sculpting process; the metal rod is made of lead, which is flexible enough to be bent into whatever angle or position is required.

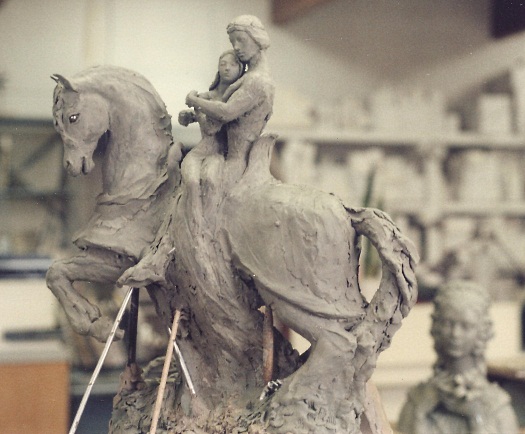
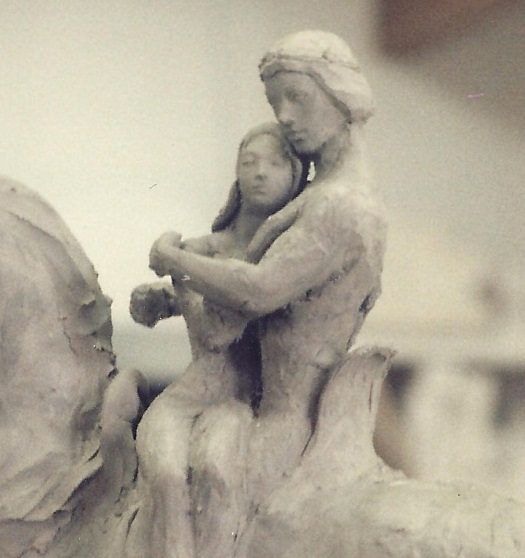
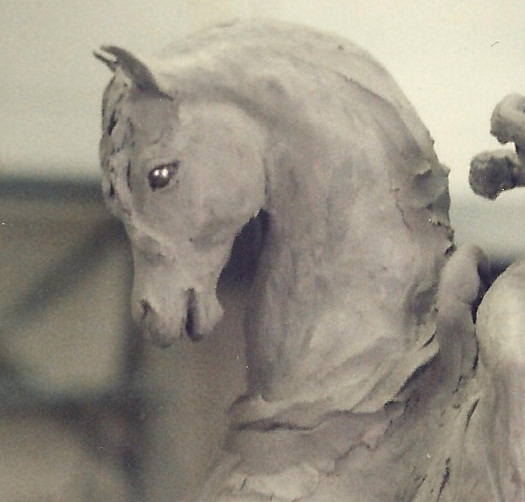
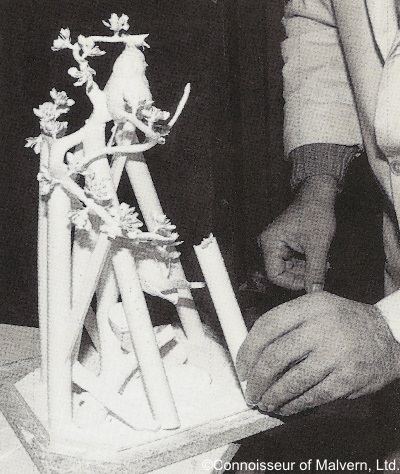
 These photos of a Lynn Klockner Brown sculpture, Pony and Children, in its model stage shows the number of supports that may be needed for a large piece such as this.
 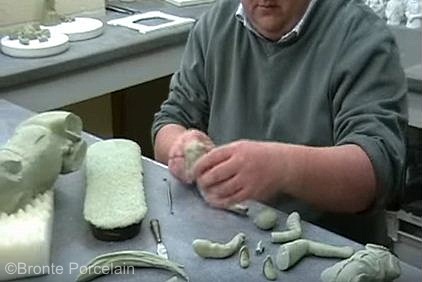 After completion and drying, the clay/plasticene model is cut apart into component pieces – often very many of them! Every one of these component pieces will require its own series of molds.
Step 2, The Waste Mold and Plaster Cast
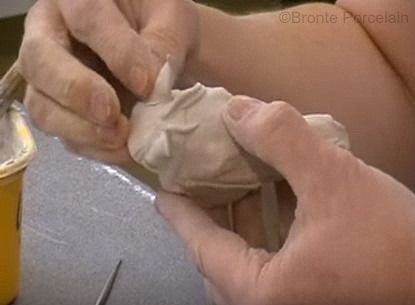
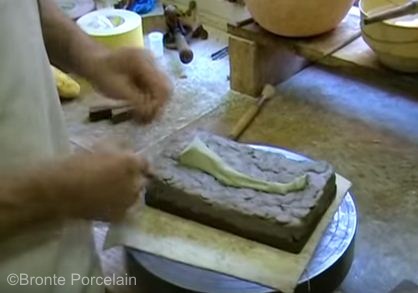 Now the Moldmaker steps in and creates the ‘Waste Mold’ from each of the individual component pieces of the original model. The Waste Mold is a negative mold made by building it up around the piece. Although not visible in this photo, the piece is put into the mold material in such a way as to create small dowel-like fittings (“ears”) that will allow all of the resulting pieces to fit back together like a puzzle.
 The Waste Mold is used to create a new (positive) component piece out of a water-based plaster, upon which more detail work is done; the waste molds are thrown away, hence their name.
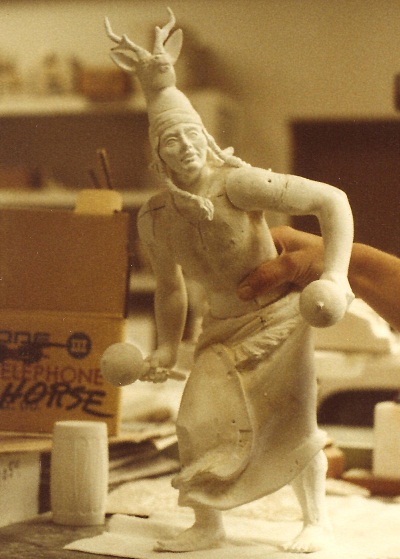 The individual plaster components are then fitted together to make sure that everything comes together properly. This assembled Yaqui ‘Deer Dancer’ shows the pencil-marked guides for proper arm placement as well as small holes and attachment points. These first castings are not fired, and so they are still the same size as the original model.
Step 3, The Master Mold, a/k/a Block Mold
Each refined individual plaster positive component is then used to create a negative Master Mold. Some people call this the Block Mold. This is the second ‘negative mold’ in the process and produces a mold that contains all of the fine detail that was added to the plaster piece. (Some studios eliminated the Waste Mold step and went directly to the Master/Block mold for producing the plaster casting.)
Step 4, The Case Mold
Each negative Master Mold is then used to create a positive element out of a harder material called Hydrostone; this is called the Case Mold. (The Master Mold is coated with soap on the inside so that the positive Hydrostone item will disengage cleanly.) The Hydrostone molds are kept, because they can be used again and again due to the harder material.
Often you will see statements like “the master molds were destroyed” in reference to a completed run of a limited edition piece. Depending on the individual studio’s procedures and chosen nomenclature, they could be referring to either the Master/Block Mold or to the Case Mold. Whether such ‘destruction’ actually took place is another question, because it would be illogical for the studio not to have a means by which to re-create a missing element in the event of significant damage to a customer’s piece in the future… or an easy method by which to make a downsized replica later on, as Cybis did with their Hall of Fame series.
Step 5, The Working Mold
 The Case Mold is then used to create a Working Mold which is a negative mold. This is the one that looks like a box with straps or bands around it. The Working Mold is the one that creates the pieces of the sculpture that will eventually be sold, because it is what the liquid porcelain material (called slip) is poured into.
Step 6, Casting
Now the process is turned over to the Caster. As the slip is poured into the Working Mold, a thin layer of it adheres to the surface of the mold’s interior. Surplus slip is poured carefully away at the precisely correct time, and the mold is allowed to dry before the resulting shape is carefully removed. As the layer of liquid porcelain slowly dries, it shrinks away from the surface of the mold. The resulting “greenware” pieces are extremely fragile.
 Because each casting results in a minute layer of porcelain adhering to the inside of the Working Mold after the porcelain piece shrinks away, these molds can only be used a few times before the fine detailing in them starts to become blurry. A dozen castings is about the limit for a Working Mold but if there is a lot of detail it may not even last that long. The ‘blurred’ Working Mold is thrown away and a new one created from the hydrostone Case Mold. Because this is a much harder material, the fine detailing on its surface is never lost.
Keep in mind that we’re still talking about doing this for every single individual component piece that the original Design Mold was cut up into. Thus, if a small figure of a girl resulted in 10 individual sections, these six steps had to be gone through for each of those 10 pieces.
Step 7, Finishing and Mounting
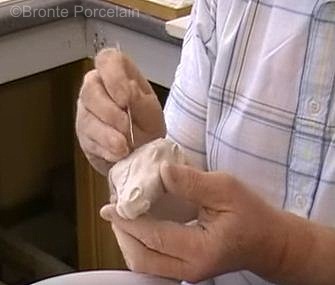
 At this stage each piece of greenware is examined and ‘cleaned up’ by an artisan called a Dry Finisher (studios in England called this stage fettling.) Small handmade elements such as flowers, leaves, ribbons, ears, etc. are also created and attached wherever they need to be, using a small amount of slip as an adhesive. Finally the entire piece is meticulously reassembled. Because a typical limited-edition sculpture can easily consist of 20 or more individual pieces, this step takes considerable time and skill on the part of the artisan called the Mounter. Any seam lines when the individual components join together are carefully removed.
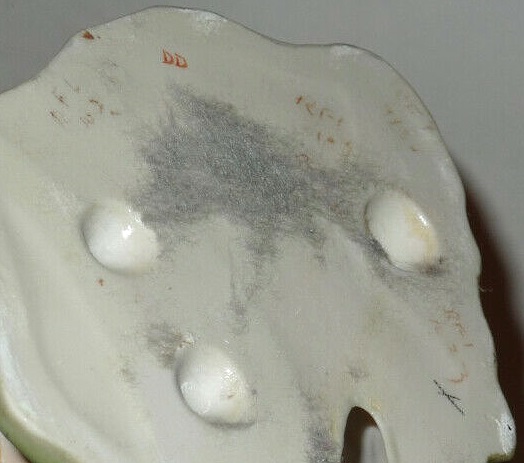 Each separate mold component is usually marked to indicate what sculpture it belongs to, usually in the area of attachment. The main mold is also marked so show what pieces must be added to it. This is the underside of a King David from which the original grey felt covering was removed. There are five faint brown-pencil notations, all starting with the letters RFL. These numbers clearly represent the five mold pieces comprising the figure: main body, left arm, right arm, musical instrument, and base section. The meaning of the DD stamp is unknown.
If the design is a floral piece, this stage is where all of the individual flower petals and leaves are created and/or assembled together. For example, the Cybis Dahlia is comprised of 90 separate petals, each one formed by hand and joined to create a flower that is more than 6″ in diameter.
Step 8, Bisque Firing
 Now it’s time for the first firing. Because the heat of the kiln will alter the size and also the shape of the greenware piece, it must be supported at the proper spots by props made of the same porcelain slip that was used in the Working Molds. This makes sure that the props will shrink at the exact same rate and percentage as the assembled sculpture that they are holding in place, and that all parts of the design will emerge in their intended positions. Depending on the exact formulation of the liquid porcelain, shrinkage can range from 15 to 30 percent.
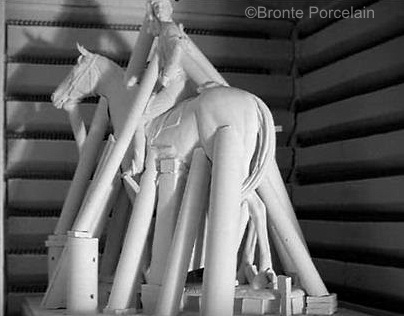
 Most studios had their big kilns set on steel rollers so that the sculptures could be assembled and then the kiln body was moved into place around them. This is because moving an extensively propped piece would likely shift the props out of place. The size of the sculptures determined how many could be fired at once time in any particular kiln. Simple sculptures requiring little or no propping could simply be placed by hand into a stationary kiln. This photo, taken inside the Cybis studio in 1983, shows one of the large kilns. Some of the pieces have props but most do not.
Now the Kiln Operator takes over. This first firing is called the bisque firing with the heat gradually rising to 2500F (about 1200C). Pyrometric cones are placed inside as well, usually in a set of three that will melt at specific temperatures; these cones must be carefully watched by the kiln operator because this will indicate the proper time to turn off the kiln. Depending on the exact formulation being used, the entire process from turn-on to the removal of the fired bisque figures takes at least two days. During this firing the color of the pieces changes to the bright white typical of bisque porcelain.
There is always an element of risk in any firing. Marylin Chorlton said in a 1968 interview that they had to discard about 60% of their pieces after the bisque firing because some part of the piece did not respond to the firing as expected.
Special Note: The procedure described so far applies to hard-paste porcelain which is the type that was used by American porcelain studios. In the UK and in some parts of Europe, bone ash is added to the slip, resulting in bone porcelain which they also called fine bone china. Because of their differing chemical composition, such pieces require a second firing after being sprayed with an almost imperceptible glass-based glaze. This so-called ghost firing is done at about 2300F/1100C and lasts for 10 hours. American-made hard-paste porcelain pieces did not require this step.
The fired sculpture is then carefully inspected for any problems or flaws, or any minute cleanup that may be needed before the next stage.
Step 9, Painting and Paint Firings
 The bisque sculptures now become the province of the Painter. The paints used on art porcelain arrive in powdered form and are composed of various metal oxides that will transform into specific colors when exposed to the heat of a kiln. Blues and greens result from chromium and copper mixed at the correct rates with soda and potash; yellows, oranges and reds come from iron; manganese and cobalt results in blues and purples. Changing the oxygen ratio inside the kiln will change the final paint color as well. It’s the responsibility of the Painter to ensure that the powders and liquids are mixed correctly in order to provide the proper color.
A number of different pieces were first painted in order to decide on the final choice of colors for retail production. Once established, the chosen piece becomes the “painting standard” (in the UK) or “artists proof” (in the USA) and the painters would have one of these in front of them as a guide when painting the production pieces. Typically marked as A.P., if any were sold at retail later they would have those letters in the place where the sculpture number would normally go. Some studios also gave this designation to the colorway-test pieces that were initially created but not chosen. The Cybis studio used A.P. to designate any one of nine possible scenarios for that particular sculpture!
The proper method of painting is to fire the piece after each range of color is applied by the artist. This is done much lower (relatively speaking!) temperatures ranging from 1200F-1700F (600C-800C) but each firing requires 12-16 hours. Typically anywhere from three to five color firings are needed, but a piece having a wide range of colors could require considerably more. Each color firing carries a risk of a paint coming out a different color than it should, as in one 1950s fox fired at Cybis that emerged from the kiln blue even though the other foxes fired with it were the proper expected reddish brown.
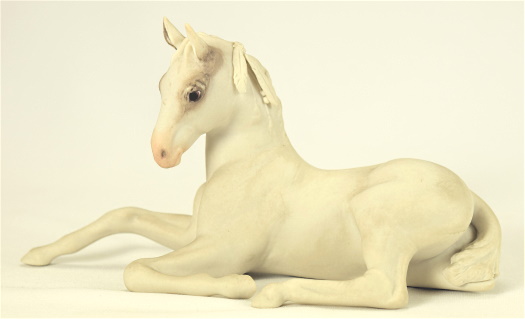 Here is a Pinto Colt in the very first stage of the decorating process. The artist has painted his muzzle as well as the areas around his eyes and ears. This photo has a yellow cast, and the piece itself is dirty from poor storage; the natural color is pure white bisque.
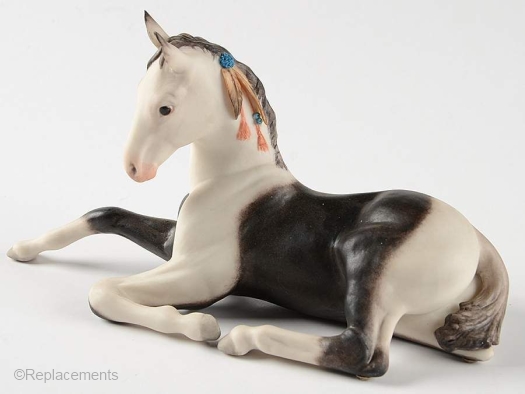 This is a fully painted and fired Pinto Colt.
If gold accents are to be used, it is always the final paint color as either 18k or 24k paint. If more than one layer is needed, the piece needs a separate firing at about 1300F (700C) after each application. Because the resulting finish can sometimes be dull, the areas need to be burnished by hand in order to bring them up to a reflective shine. Cybis developed a proprietary paint color called “old coin gold” with an appearance closer to that seen on antique European pieces but this paint was only used on some of their 1950s religious items and discontinued after that.
Backstamps and Signatures
The backstamps (maker’s marks) are usually applied during one of the paint firings, except for the sculpture number on limited editions which are typically added by hand as the final step. Depending on the studio’s preference, backstamps could be applied by hand with paint, applied with decals, or a combination of the two.
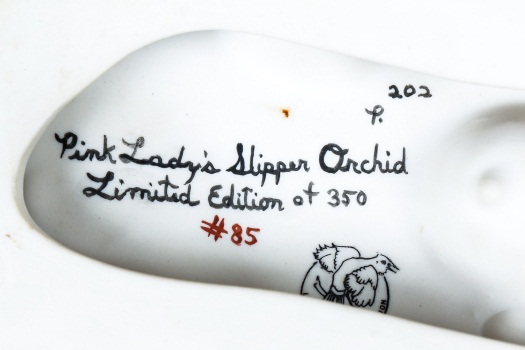
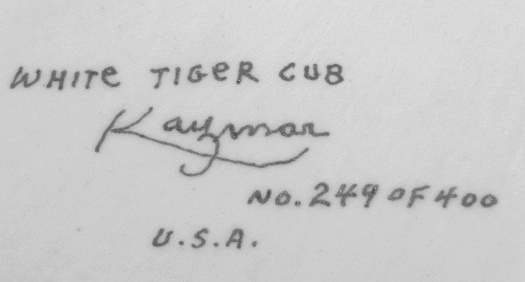 Some studios never used decals at all but instead applied all their marks with paint, either freehand with a brush or with a rubber stamp. Kazmar used the freehand method for all of their “backstamp” information, including the sculpture name and edition information for limited ones.
 Cybis did not use decals either, but they did use a stamp on many 1950s pieces and, later, for the copyright symbol and for the 50th Anniversary stamp that was applied to pieces manufactured in 1989 only.
 Burgues completely hand-painted theirs, except for their studio logo which was a decal.
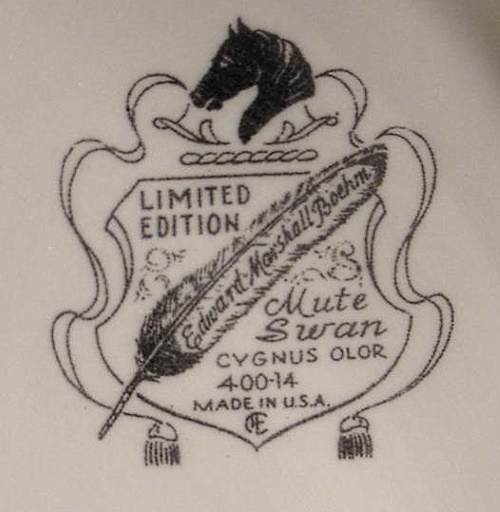 Boehm’s backstamps were entirely composed of decals except for the individual sculpture number which was hand applied. The example above is not a limited edition and so no sculpture number was needed.
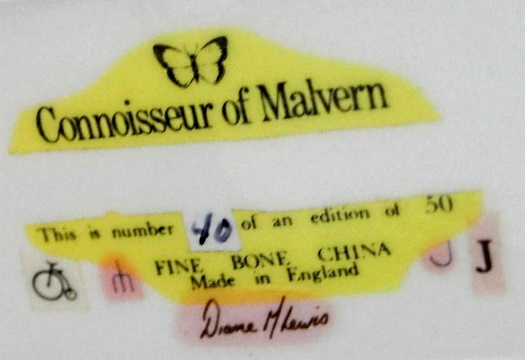
 Connoisseur of Malvern took the ‘combination’ approach, with most of their multiple backstamp elements being decals except for the sculpture number and sometimes the edition size. Unlike Boehm, however, the sculpture name was applied by hand in paint almost as often as by decal, as this example shows. The designer’s name (Aileen Burton) is a decal, not a painted signature.
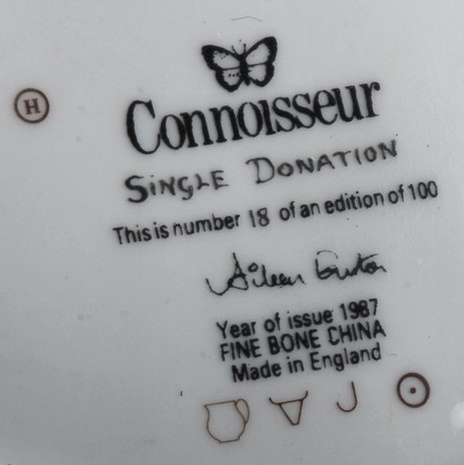
 This is what happens if the kiln temperature is not quite high enough to burn away the body of the decal! This is the resulting backstamp on a piece that was fired badly.
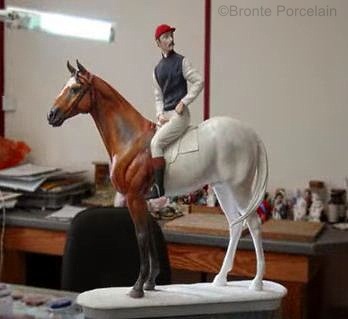
 This is a finished Knight in Shining Armor that began as the clay model shown in the first photographs. According to Lynn Klockner Brown, who designed it, the ‘deconstruction’ of the model resulted in no less than thirty component molds.
During the glory years of art porcelain in the United States and England it was not unusual for limited editions to have retail prices of several thousand dollars, as past collectors of studios such as Albany, Boehm, Bronn, Connoisseur of Malvern, Cybis, Royal Worcester, and others can attest. Most of the artists and artisans who created these works are no longer with us, and the art of creating art porcelain is being steadily lost along with them. But perhaps a fresh appreciation of the skills that went into making those sculptures may one day spark renewed interest!
[This post originally appeared on my personal blog site in 2017, and has been relocated here.]
Name Index of Cybis Sculptures
Visual Index (for human figures/busts only)
About the Cybis Reference Archive
What is Cybis?
Images of Cybis porcelains are provided for informational and educational purposes only. All photographs are copyrighted by their owner as indicated via watermark and are used here only as reference material. Please see the Copyright Notice in the footer and sidebar for important information regarding the text that appears within this website.
The Cybis Archive is a continually-updated website that provides the most comprehensive range of information about Cybis within a single source. It is not and never has been part of the Cybis Porcelain studio, which is no longer in business.
